
A few week ago I got busy making my swaps for Stampin’ Up! convention in 2 days time. My swaps are actually double-sided, hybrid (a mix of digital and traditional papercrafting) designs this year……so…..no room for instructions on the back! Instead I am putting my list of ingredients and instructions on my blog right here so that you can re-create the project at home if you wish to 🙂
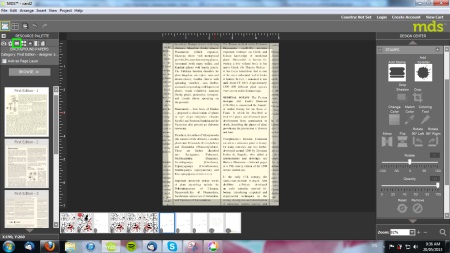
The photo above is the digital side of my design. Here are some screen shots that show how to create a similar look using the following elements that come ready to use with the full MDS download.
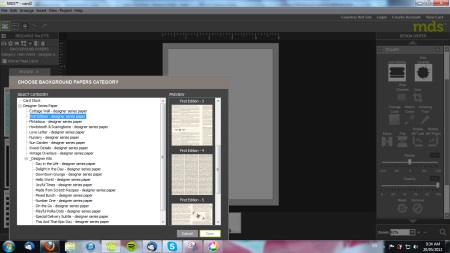
Step 1 : Select a background paper from the Resource Pallet on the LHS of your screen (I’ve used Early Edition DSP as my background). Click choose so that you can make your selection and drag and click your choice over to your project – yes it’s that easy!
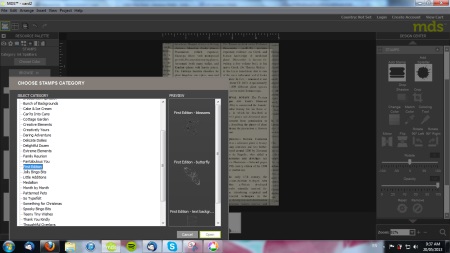
Step 2 : Choose your stamps category by selecting the “stamp” tool, select the category then drag and click your desired images into the project. Most images are vector images so you can click on the corner of each one to resize without pixillation happening – pretty cool!
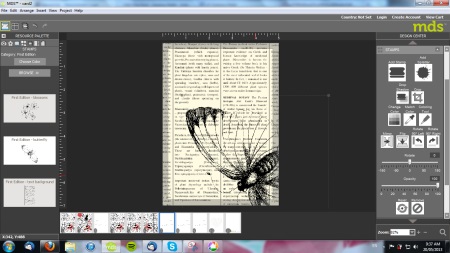
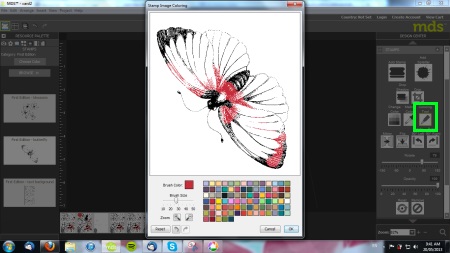
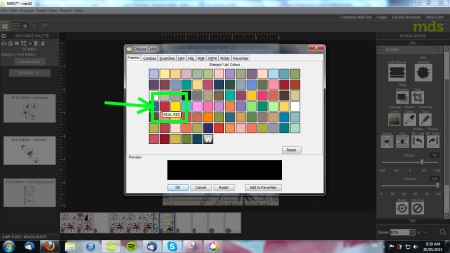
Step 3 : Select desired image for colouring then select the “Colouring Tool” in the design centre on RHS and select the brush size and “paint”colour, I’ve used Real Red, colour over desired placed on Butterfly image and click okay to complete on project.
Step 4 : Use the Rotation Tool in the Design Centre on the RHS to position Butterfly :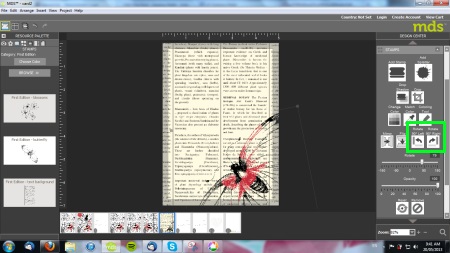
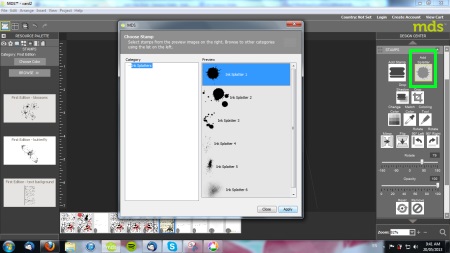
Step 5 : Add Paint Splatters using the tool on the RHS in the Design Centre :
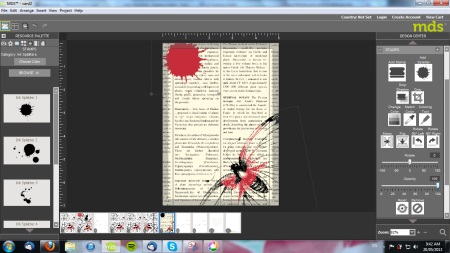
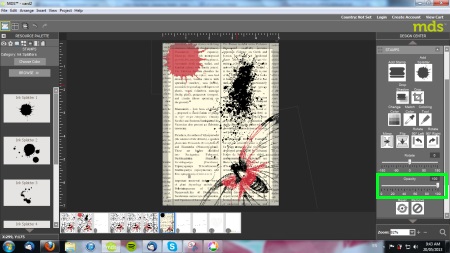
Step 6 : Highlight desired objects and Adjust Opacity using the Tool highlighted in the Design Center on RHS of screen :
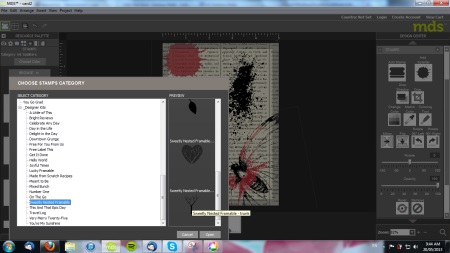
Step 7 : Bring in additional stamp images from Resource Pallet on LHS of screen and drag to desired position, re-size as needed by dragging corners of image in or out.
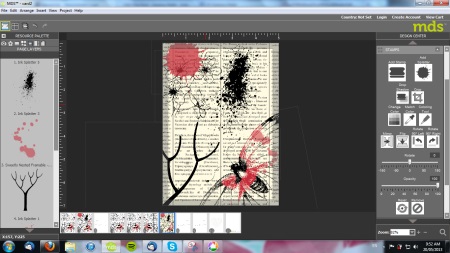
Step 8 : When you are happy with it, save your project (it will be in your MDS Files in your documents folder). If you wish to print out your project 4 to a page like I did (for stamping on the back or to create a one layer postcard or gift tag) select image from Documents and save as a PDF document and resize by dragging corners to create a 4, 6, or 8 to a page document for printing as desired and click print.
And………here is the other “traditional” paper-crafting side and list of the ingredients I have used :

Stamps : Clockworks, Feelgoods stampsets
Ink : Basic Black Craft Ink pad (my new favourite!), Real Read Classic Ink Pad, Basic Black Marker
Paper : Whisper White, Very Vanilla, Real Red, Basic Black cardstock, Silver Glimmer Paper.
Accessories : Basic Black/Basic Gray Two Tone Ribbon, Black Scalloped Dotted Ribbon, Real Red Taffeta Ribbon, Colour Spritzer Tool, Sods Pop Tops, Big Shot, Beauful Wings Embosslits Die, Basic Rhinestones, Stampin’ Dimensionals, Glue Dots, 1/2″ Circle Punch, Corner Rounder Punch, 1″ Circle Punch (for reinforcement ton the Digital side of the tag).
TIP : To flatten your Soda Pop Tops, run through the Big Shot between two cutting mats with NO TABS (i.e. both flaps OPEN on the multi-purpose platform)
If you compare the two sides, you’ll see that you can do pretty much everything with MDS that you can do with traditional papercrafting……and more! I especially like the Splatter Tool and playing around with the Opacity Scale on the right hand side in the Design Centre for creating texture and layering images one on top of the other – just like “real” stamping :). The best part is that you can see all your layers over on the left hand side in the Rescource Pallet and just click and drag to adjust and repostion your layered stamps/papers and embellishments – so there are no mistakes to be made. The “Undo” button is also a helpful tool – hmmmmm ……. wish I had one of those for real life sometimes 😉
Have fun playing and see what you come up with – remember………MDS allows you to create designs will be as unique as you are – no running out of supplies, no limits, no rules!
Don’t forget to follow me on Facebook from Wednesday 22nd onwards for updates from Stampin’ Up! Convention!


 by
by
2 thoughts on “2013 Convention Swaps Tutorial and Project Receipe”
Hi Ness! Love your swaps! Would be clamouring for one if I was going! Love the “eclectic” design of both. Sigh! When I grow up ……
Hugs xxx
Love this great tutorial and your swaps were just so striking in black and white and red. Thanks for swapping with me Vanessa. You are amazing and I am really glad to know you.