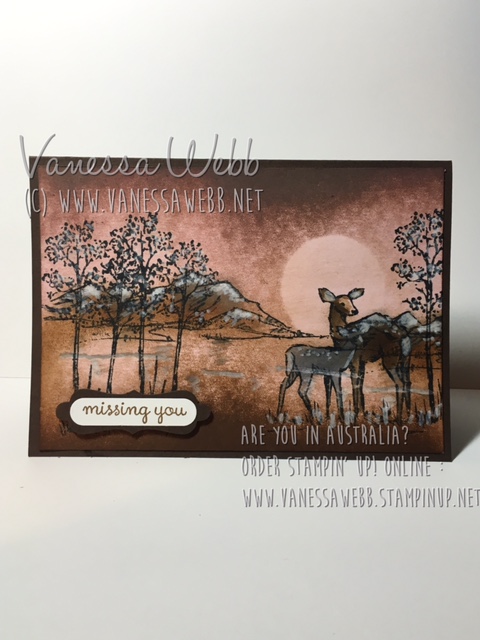
Here is the card that we created at our last Inky Fingers Demonstrator Team meeting! Designed by the talented Leonie Whiting, it features brayering, sponging, masking and highlighting to create an amazing background effect.
The basic steps to making the card are outlined below. If you would like to know more about any of these techniques or you’d like a free demonstration for you and your friends, please contact me on 0407 497 540 to book a workshop and I’ll bring all the supplies needed 🙂
Step 1 : Mask off the moon using Post It Note punched with 1 and 3/8 ” Circle Punch. Brayer the sky from the top to 2/3 down in Tip Top Taupe ink
Step 2 : Brayer the ground/lake from the bottom to 1/3 up in Soft Suede ink
Step 3 : Stamp Mountains and Deer in Early Espresso and Basic Black Archival ink
Step 4 : Sponge and shade in Mountains and water-colour the deer in Soft Suede,Tip Top Taupe and Basic Grey
Step 5: Stamp Trees in Early Espresso ink
Step 6 : Highlight mountains, trees and ripples in lake using White Chalk Marker NB complete this step last or the Chalk ink will show through the sponging!
Step 7 : Stamp and punch out greeting and adhere to card using Stampin’ Dimensionals
Here is the list of ingredients I’ve used to create my card above. Just click on any image to go to my store to browse and shop 🙂
Product List


 by
by